初心者向け CentOS7.9 に WordPress 最新版 をインストール

- いろんなサイトを見ても途中経過が記載してなく不安になる人
- 操作通りしたが動かない人
概要
Apache2.4 と PHP8.0 と MariaDB10.6 が準備できた状態に WordPressの最新版をインストールする手順です。
WordPress導入の前提条件
Apache または Nginx、PHP バージョン7.4以上、MySQL バージョン5.6または MariaDB バージョン10.1以上が必要になります。
インストールされていることの確認します。
Apache httpdのバージョン確認
httpd -v コマンドでApache httpd のバージョン確認します。
[root@localhost ~]# httpd -v
Server version: Apache/2.4.6 (CentOS)
Server built:   Nov 16 2020 16:18:20
[root@localhost ~]#
PHPのバージョン確認
php -v コマンドで php のバージョン確認します。
[root@localhost ~]# php -v
PHP 8.0.8 (cli) (built: Jun 29 2021 07:41:19) ( NTS gcc x86_64 )
Copyright (c) The PHP Group
Zend Engine v4.0.8, Copyright (c) Zend Technologies
    with Zend OPcache v8.0.8, Copyright (c), by Zend Technologies
[root@localhost ~]#

MariaDBのバージョン確認
mariadb -v コマンドで mariadb のバージョン確認します。
[root@localhost ~]# mariadb -v
Welcome to the MariaDB monitor.  Commands end with ; or \g.
Your MariaDB connection id is 3
Server version: 10.6.3-MariaDB MariaDB Server

Copyright (c) 2000, 2018, Oracle, MariaDB Corporation Ab and others.

Reading history-file /root/.mysql_history
Type 'help;' or '\h' for help. Type '\c' to clear the current input statement.

MariaDB [(none)]> quit
Writing history-file /root/.mysql_history
Bye
[root@localhost ~]#
インストール
ダウンロードして解凍します。
ディレクトリの移動
cd /var/www/html のコマンドで移動します。
[root@localhost ~]# cd /var/www/html
[root@localhost html]#
ダウンロード
wget https://ja.wordpress.org/latest-ja.tar.gz のコマンドでダウンロードします。
[root@localhost html]# wget https://ja.wordpress.org/latest-ja.tar.gz
--2021-07-31 15:46:43--  https://ja.wordpress.org/latest-ja.tar.gz
ja.wordpress.org (ja.wordpress.org) をDNSに問いあわせています... 198.143.164.252
ja.wordpress.org (ja.wordpress.org)|198.143.164.252|:443 に接続しています... 接続しました。
HTTP による接続要求を送信しました、応答を待っています... 200 OK
長さ: 15819383 (15M) [application/octet-stream]
`latest-ja.tar.gz' に保存中

100%[====================================================================>] 15,819,383  5.54MB/s 時間 2.7s

2021-07-31 15:46:47 (5.54 MB/s) - `latest-ja.tar.gz' へ保存完了 [15819383/15819383]

[root@localhost html]#
解凍
tar xvf latest-ja.tar.gz のコマンドで解凍します。
[root@localhost html]# tar xvf latest-ja.tar.gz
wordpress/
wordpress/wp-login.php
wordpress/wp-cron.php
wordpress/xmlrpc.php
wordpress/wp-load.php
wordpress/wp-admin/
wordpress/wp-admin/credits.php
wordpress/wp-admin/admin-functions.php
wordpress/wp-admin/options-reading.php
wordpress/wp-admin/edit-tags.php

~~~~~~~~あまりのも多いので省略します。~~~~~~~~~~~~~

wordpress/wp-includes/nav-menu.php
wordpress/wp-includes/class-wp-paused-extensions-storage.php
wordpress/wp-includes/class.wp-dependencies.php
wordpress/wp-signup.php
wordpress/wp-links-opml.php
[root@localhost html]#
権限設定
chown -R apache:apache . のコマンドで設定します。
[root@localhost html]# chown -R apache:apache .
[root@localhost html]#
ll のコマンドで確認します。
[root@localhost html]# ll
合計 15460
-rw-r--r--. 1 apache apache       21  7月 21 00:55 info.php
-rw-r--r--. 1 apache apache 15819383  7月 26 09:01 latest-ja.tar.gz
drwxr-xr-x. 5 apache apache     4096  7月 26 09:00 wordpress
[root@localhost html]#
WordPress 用データベースとユーザの作成
データベース作成
文字コードUTF8でデータベース wordpress を作成します。
mysql コマンドでMariaDBに切り替えます。
[root@localhost html]# mysql
Welcome to the MariaDB monitor.  Commands end with ; or \g.
Your MariaDB connection id is 4
Server version: 10.6.3-MariaDB MariaDB Server

Copyright (c) 2000, 2018, Oracle, MariaDB Corporation Ab and others.

Type 'help;' or '\h' for help. Type '\c' to clear the current input statement.
次に create database wordpress default character set utf8; と入力してください。
MariaDB [(none)]> create database wordpress default character set utf8;
Query OK, 1 row affected (0.002 sec)

MariaDB [(none)]>
MariaDB ユーザの作成
さきほど作成したデータベースのみ全権限を持つ wordpress ユーザを作成します。
GRANT ALL ON wordpress.* TO wordpress@localhost IDENTIFIED BY ‘password’;
(ユーザ名とパスワードは適宜に変更してください)
MariaDB [(none)]> GRANT ALL ON wordpress.* TO wordpress@localhost IDENTIFIED BY 'password';
Query OK, 0 rows affected (0.116 sec)
念のために再ロードします。 FLUSH PRIVILEGES;
MariaDB [(none)]> FLUSH PRIVILEGES;
Query OK, 0 rows affected (0.002 sec)

MariaDB [(none)]> quit
Bye
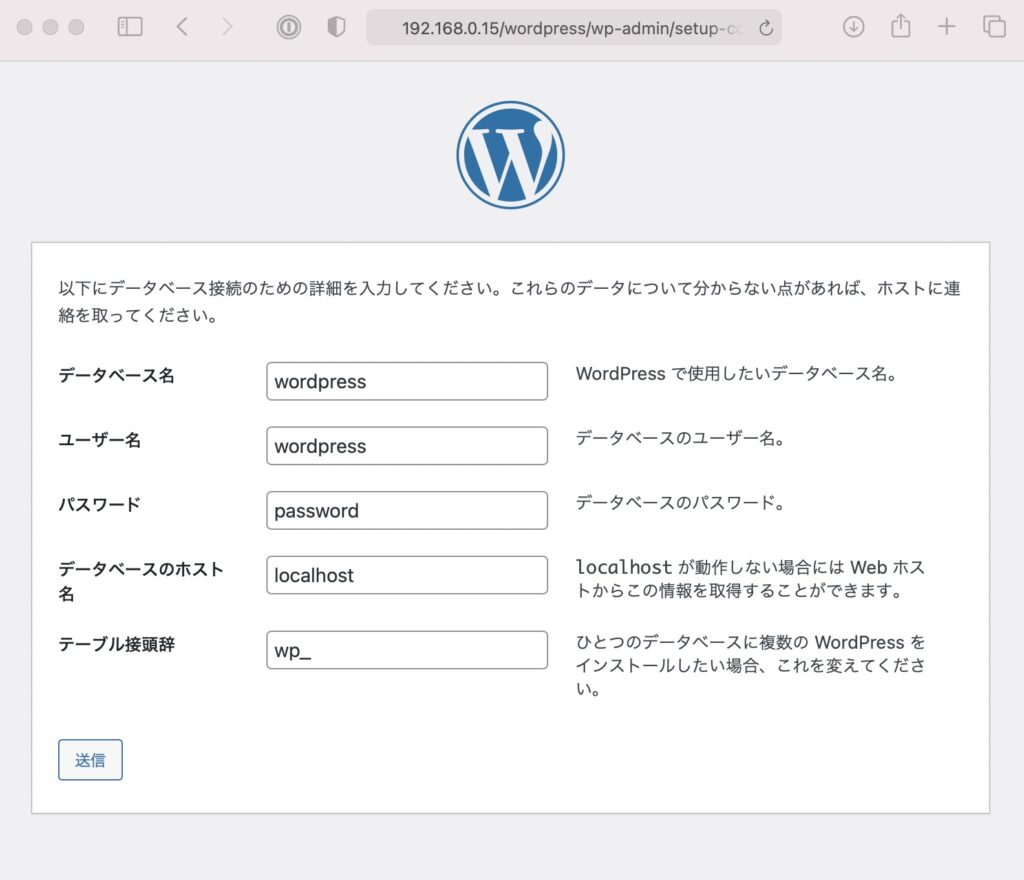
WordPress 初期設定
Webブラウザで http://xxx.xxx.xxx.xxx/wordpress このURLで起動してください。
(xxx.xxx.xxx.xxx は構築したサーバのアドレスです)
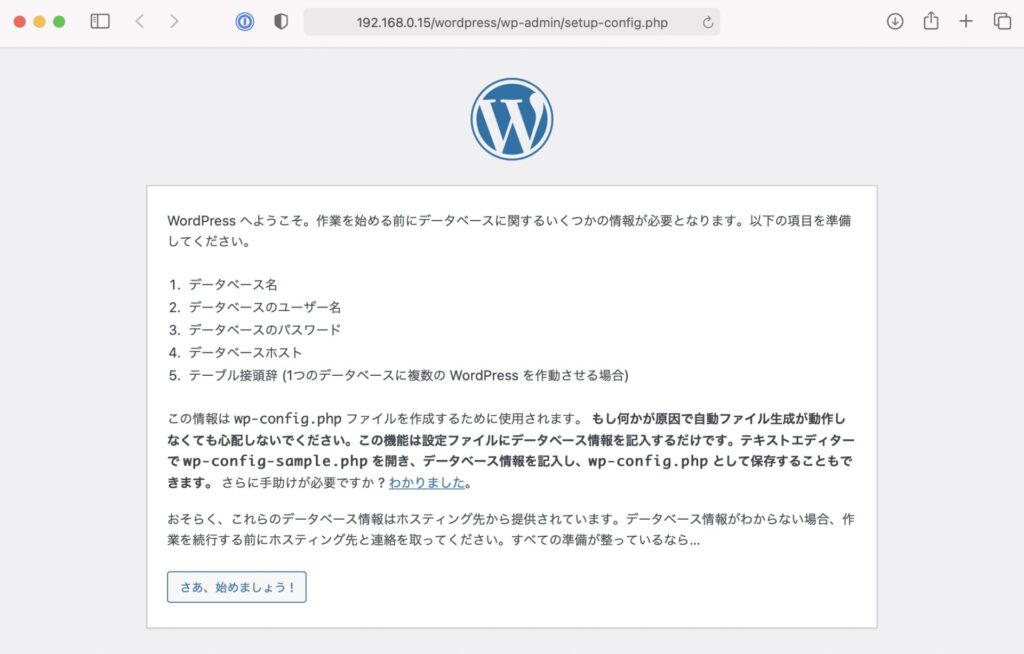
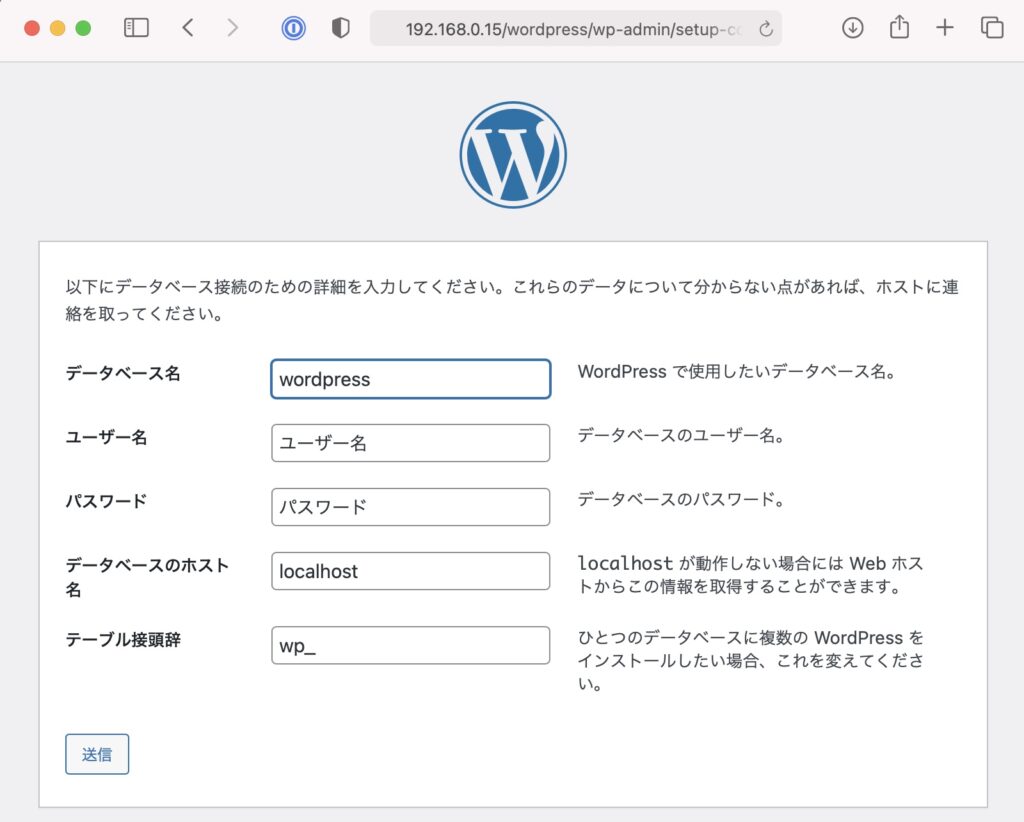
ユーザー名とパスワードは、「MariaDB ユーザの作成」で設定したのを入力してください。
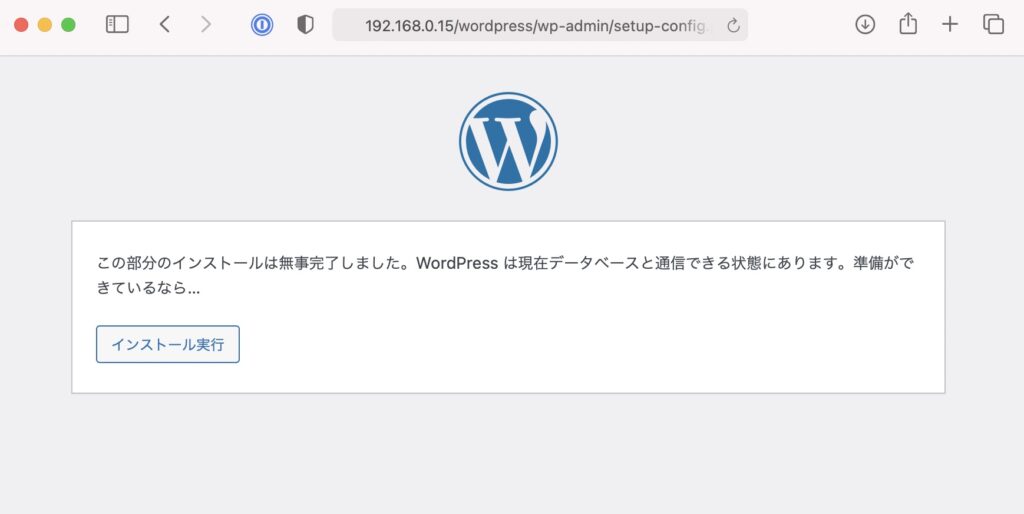
インストール実行をクリック
ようこそ の画面に変わりますので必要事項を入力してください。
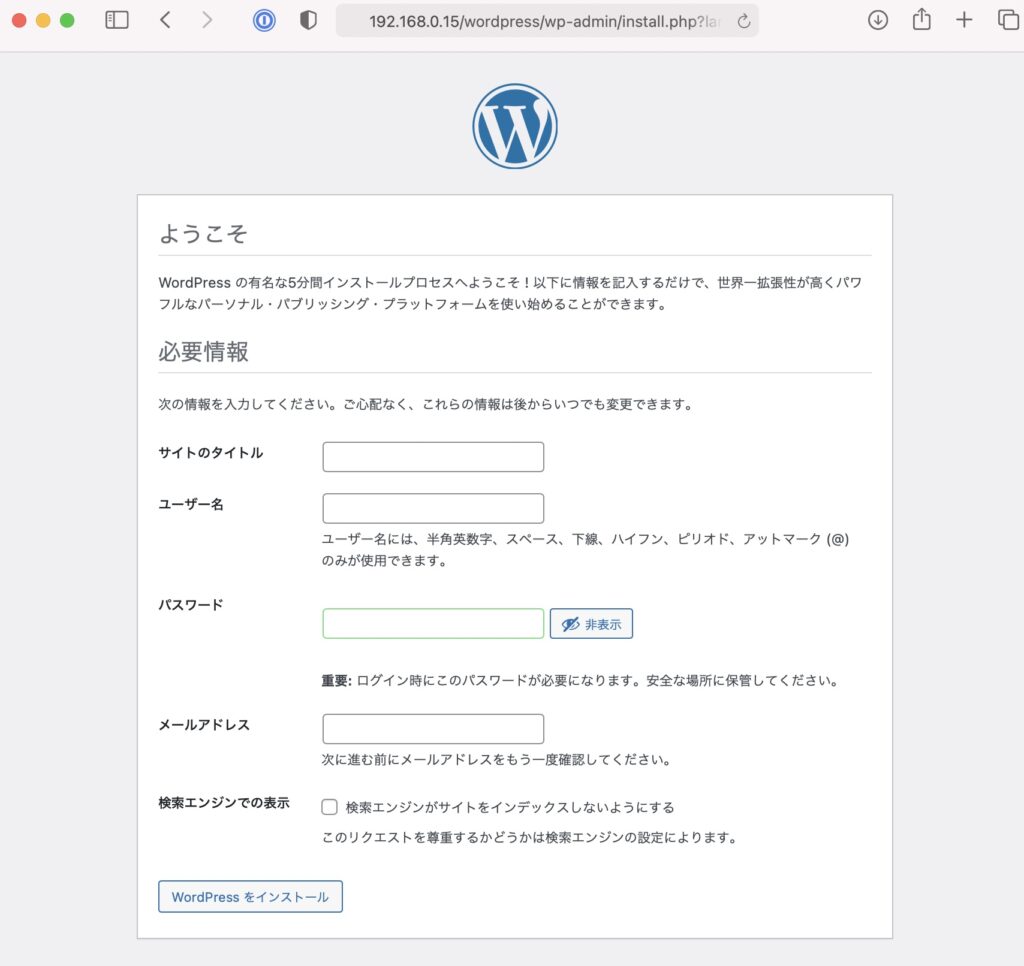
今回は、TEST と入力しました。
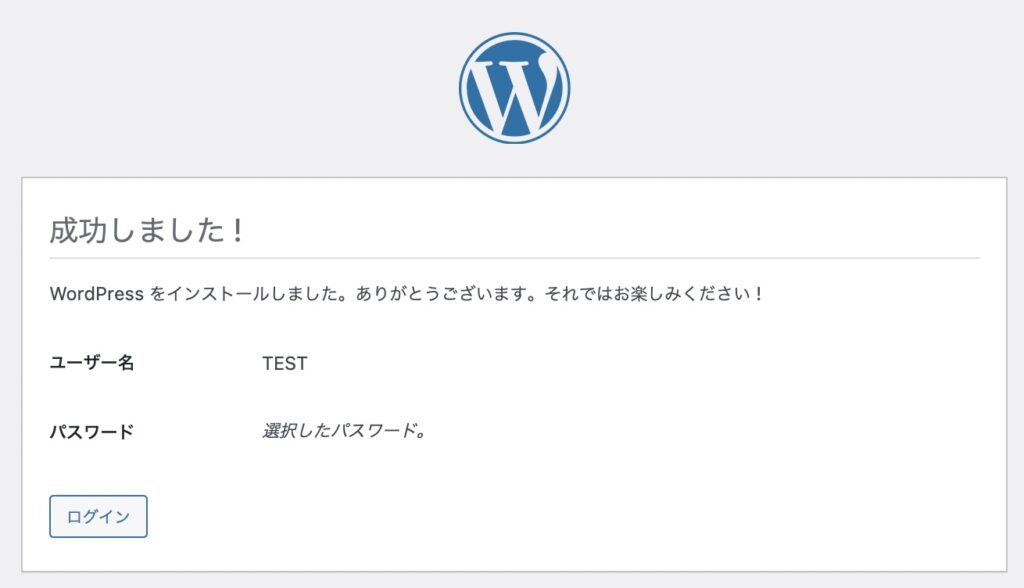
成功しました! の画面 ログイン をクリック
先ほどのユーザ名とパスワードを入力して ログイン をクリック
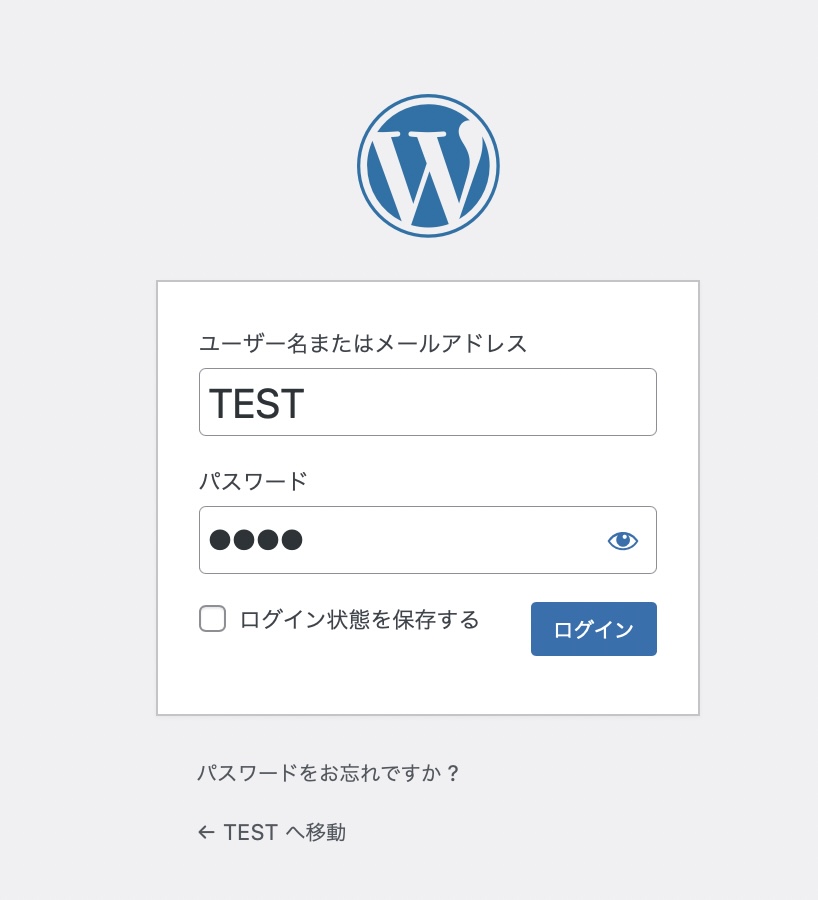
ダッシュボード画面が表示されましたので、インストールは完了です。

お疲れ様です。
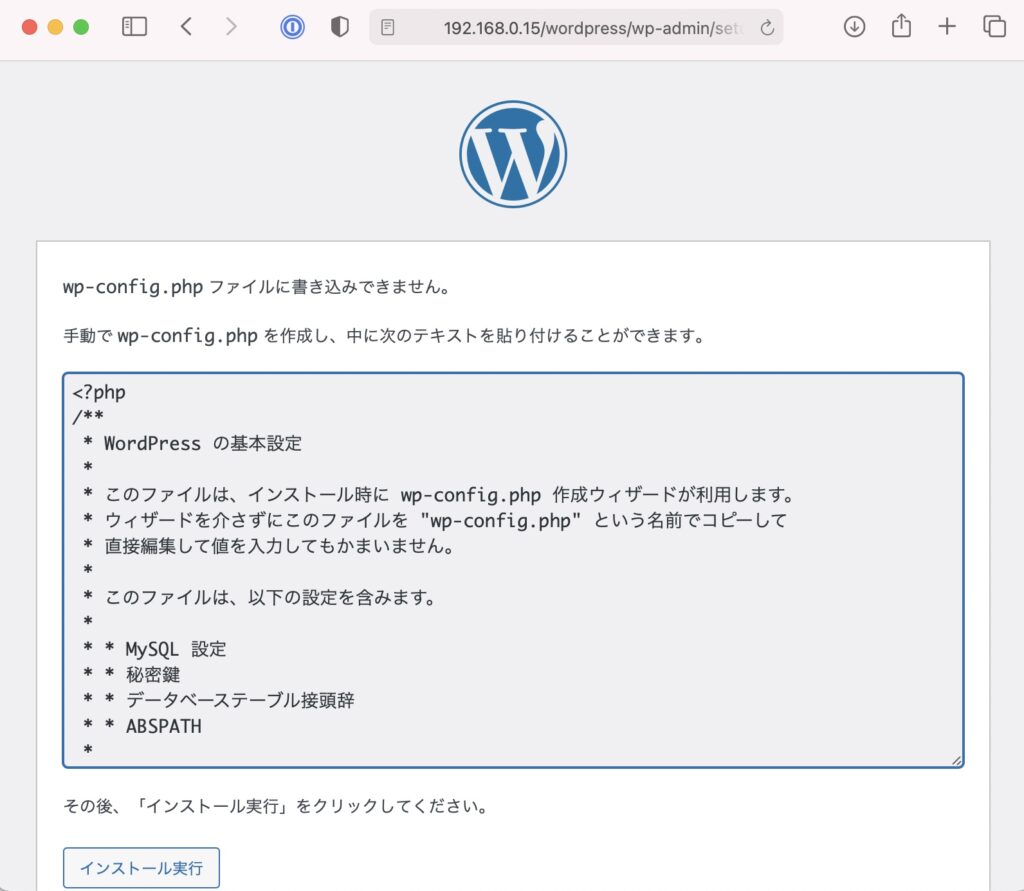
wp-config.php ファイルに書き込みできません。の対応
下記の画面が表示された方は、SELinux (Security-Enhanced Linux)によってファイルに書き込みできなかったと思います。
getenforce コマンドで確認します。
- Enforcing:検知して拒絶する
- Permissive:検知してログに書き込むが、拒絶まではしない
- Disabled:無効。検知も拒絶もしない
[root@localhost ~]# getenforce
Enforcing
[root@localhost ~]#
一時的に無効にして設定する方法
setenforce 0 コマンドで Permissive に変更される
setenforce 1 コマンドで Disabled に変更される
永続的に無効にする方法
vi /etc/selinux/config コマンドで下記の赤字を変更して、OSの再起動してください。
# This file controls the state of SELinux on the system.
# SELINUX= can take one of these three values:
#     enforcing - SELinux security policy is enforced.
#     permissive - SELinux prints warnings instead of enforcing.
#     disabled - No SELinux policy is loaded.
SELINUX=permissive
# SELINUXTYPE= can take one of three values:
#     targeted - Targeted processes are protected,
#     minimum - Modification of targeted policy. Only selected processes are protected.
#     mls - Multi Level Security protection.
SELINUXTYPE=targeted
まとめ
この手順通り進めば、約20分ぐらいで設定が完了しますが
SELinux (Security-Enhanced Linux)で苦戦しました。

![]()